




You've pulled the old trough out, or you're standing in the laundry with a tape measure deciding whether the whole thing needs replacing. Either way, the question that shapes the job isn't the cabinet size or the tap finish. It sits under the floor: where the waste runs, how far it travels to the drain, whether the gully gets touched, and who has to sign off once it does.
Laundry tub installation gets written about as though it's a cabinetry exercise. Measure the space, buy a trough, fix it to the wall. That's the easy part, and it's the part that rarely costs anyone money. The expense and the frustration sit in a waste run that's too long, a trap with no vent, a machine hose discharging over the rim of a trough that can't keep up, or a below-ground connection nobody wrote down.
Start with the drain and the rest falls into place.
Table of Contents
- Which Installation Scenario Changes Your Paperwork
- Waste, Trap and Drain Rules That Trip Up Installers
- Tap Ratings and Water Use Rules for Laundry Tubs
- How to Install a Laundry Tub Step by Step
- Leaks, Slow Drains and Smells and How to Fix Them
- Decide Whether to Hire a Licensed Plumber
Which Installation Scenario Changes Your Paperwork
| Scenario | What changes | Compliance pathway |
|---|---|---|
| Same-location replacement | Tub swapped, existing waste and trap kept | Confirm WaterMark certification of regulated products; certificate needed for work of $750 or more |
| Relocated tub | New supply and waste runs | Treat as new fixture work; compliance certificate from a licensed plumber |
| New waste connection or gully change | Alteration to the sanitary drain | Compliance certification for below-ground work and inspection offer for drains or gullies |
| Full laundry renovation | Tub, taps, pipework and drainage change together | Certificate for the plumbing work; confirm the inspection pathway with your plumber before starting |
Read down the middle column. Swapping a trough in the same spot and reusing the existing waste and trap is the only scenario that behaves like a fixture replacement. The moment new supply or waste runs are cut in, you're doing new fixture work, and the job stops being a swap no matter how small the trough is.
The two changes that turn a swap into certified work
The first is contact with the sanitary drain. The second is a new fixture position, which almost always drags the drain along with it. Victoria's rules don't hinge on the price of the trough either. The Building and Plumbing Commission's plumbing regulatory framework requires a licensed plumber to issue a compliance certificate for plumbing work costing $750 or more, and requires compliance certification for below-ground sanitary-drain work regardless of how small the project looks. Below-ground sanitary drains and their associated gullies must also be offered for inspection.
That's the part most guides skip. A homeowner reads that a trough is "just a fixture" and books a handyman, then discovers the new waste position needs a connection cut into the drain under the slab.
Where DIY stops: a trough sitting on a cabinet is a fixture. A new connection into the sanitary drain is plumbing work, and it carries the paperwork with it.
The same logic applies when you check if your kitchen needs permits before a renovation: the visible item is rarely what triggers approval, the services behind it are.
Regulated products matter too. A tap or trough that's a regulated product should be WaterMark-certified where certification is required, because a plumber can't legally install a non-certified regulated product even if you've already bought it and it's sitting in the hallway.
Before you buy anything, do four things:
- Measure the existing waste position from the wall and from each side, so you know whether the new trough lines up.
- Trace the drain route as far as you can see it, including whether the gully is shared.
- Check the cabinet space against the trough's actual footprint, not the box dimensions.
- Note the tap location and whether the existing isolation valves are reachable.
Waste, Trap and Drain Rules That Trip Up Installers
A tub can fit the cabinet and still leave a drainage problem. The waste, trap, vent and drain route determine whether the installation drains properly and whether the work needs inspection. Under AS/NZS 3500.2, a laundry trough is a distinct waste fixture. Where its discharge pipe connects to a DN 80 vented branch drain, the pipe must be at least DN 40. Waste-pipe length also depends on the configuration, so check the applicable code provision rather than applying one distance to every layout.
The trap needs the right connection and position to retain its water seal and drain effectively.
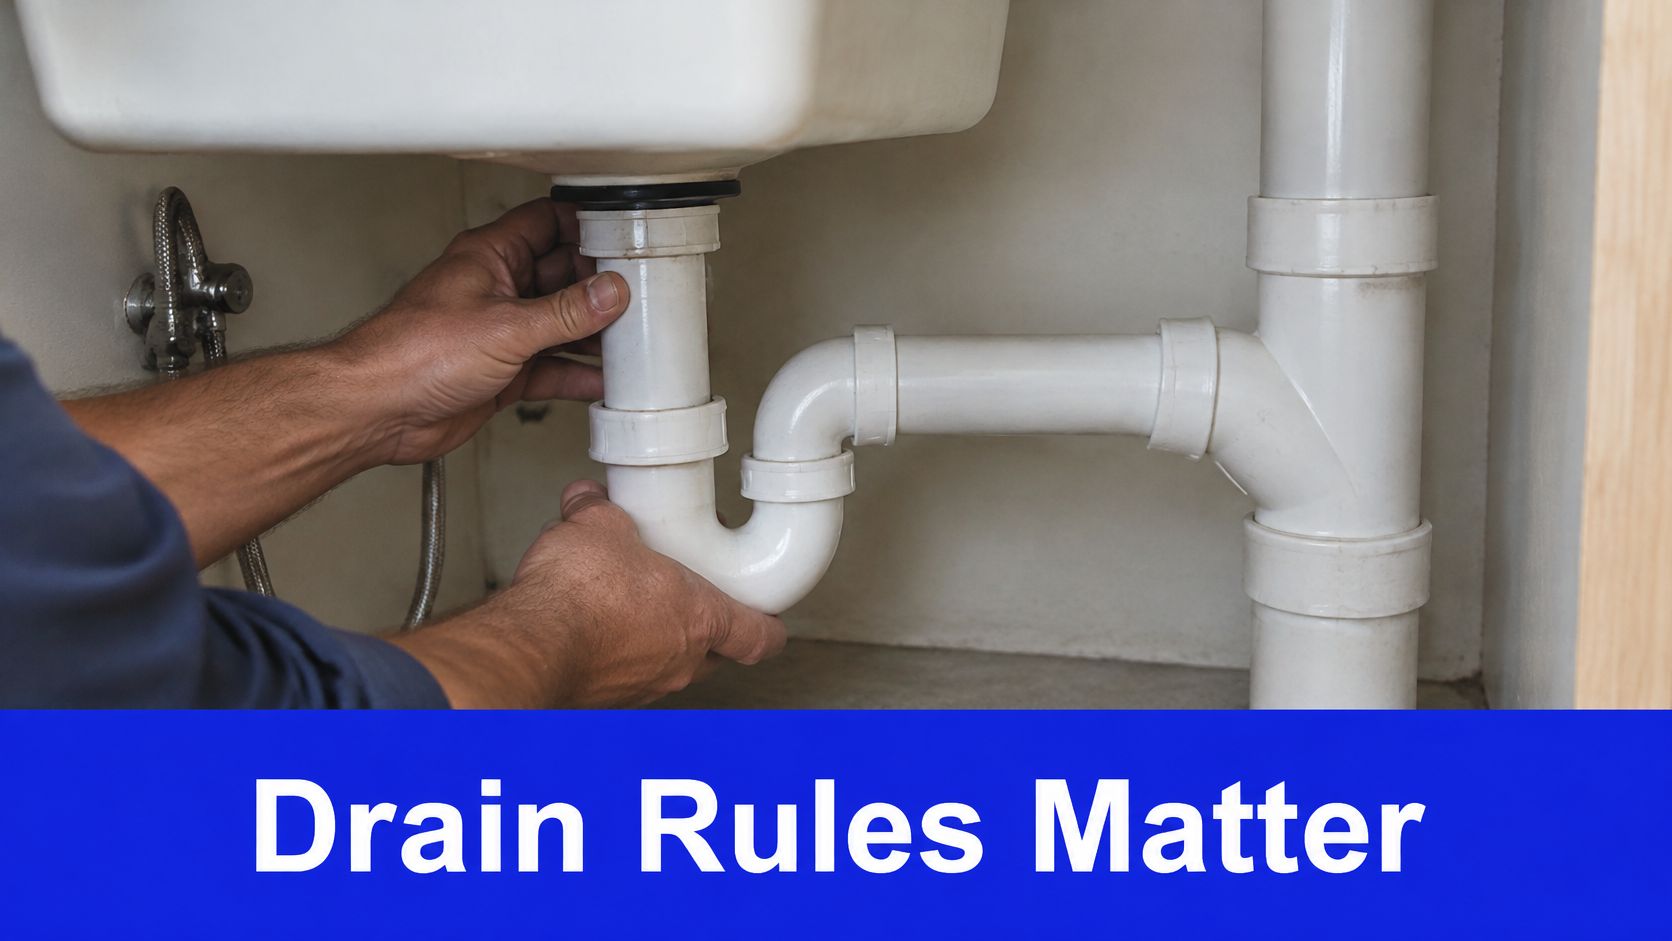
The NCC sanitary drainage provisions list a typical trough connection as 40 mm, with a fixture-unit value of 3. They also set a maximum trap-to-vent distance in the branch-design provisions. The permitted distance depends on the drainage arrangement, so confirm the applicable limit before fixing the pipework.
Why distance decides the job
Moving the trough to the far end of the laundry may free wall space for a dryer, but it changes the waste route. Check the proposed run against the code limits, along with its fall and vent arrangement, before fixing the cabinet. An overlong or poorly graded run can drain slowly or gurgle at the trap, and correcting it after the wall or cabinet is finished may mean dismantling the work.
The washing machine is the wildcard
A domestic washing machine can discharge over the rim of the trough or through a dedicated suds-saving connection. Over-rim discharge avoids an extra fitting, but the pump can deliver water faster than the trough waste clears it. A shallow trough may overflow during the cycle. A dedicated connection can avoid that risk, provided it is installed to suit the drainage system.
A slow existing drain should be investigated before the new cabinet goes in. Connecting a new trough to a restricted line can leave you with the same drainage problem and make access harder once the cabinetry is installed. For help with a blocked drain affecting the laundry, get the restriction cleared before the new fixture is fitted.
Plan the cabinet around the trap and pipe access, not just the tub footprint. These under-sink cabinet planning tips cover clearances that matter when pipework needs servicing. Before cutting or connecting pipe, confirm the drain route, the run's fall, the trap-to-vent distance and access for future maintenance.
Tap Ratings and Water Use Rules for Laundry Tubs
A laundry tub's tap needs to meet the applicable water-efficiency requirements, and its rating applies to the complete tap assembly, not just the aerator fitted at the outlet.
The NCC Volume Three sets a benchmark of at least a 3-star WELS rating for a tap serving a laundry trough, with flow no greater than 9 litres per minute. At that maximum rate, filling the trough for 10 minutes uses about 90 litres. A higher-flow outlet may fill a bucket faster, but it also uses more water during soaking, pre-washing and hose filling.
| Requirement | Current benchmark | From 1 March 2027 |
|---|---|---|
| Laundry trough tap WELS rating | At least 3 stars | At least 4 stars for kitchen and laundry sink taps; confirm trough taps with your plumber |
| Maximum flow | 9 L/min | No separate figure published; the 4-star rating sets the limit |
| Hot-water temperature limit for troughs | None specified in cited guidance | None specified in cited guidance, so no change for troughs |
| Ten-minute trough fill at maximum flow | About 90 litres | Under 90 litres at the same fill, since the rated flow is lower |
The Plumbing Amendment Regulations 2026 are scheduled to commence on 1 March 2027. The regulations require kitchen and laundry sink taps used in regulated plumbing work to have at least a 4-star water-efficiency rating. They apply to new and existing buildings, including alterations and fixture replacements, subject to stated exemptions and thresholds. If your renovation will continue beyond that date, ask your plumber whether the laundry trough tap is covered by the rule.
The same guidance specifies no maximum hot-water temperature for laundry troughs. Limits apply to personal-hygiene fixtures such as showers and basins, rather than troughs.
Practical rule: check the WELS label for the complete tap, not only its flow restrictor. Check it again if someone replaces parts or adds an unrestricted hose.
A low-flow tap cannot make up for poor pipe sizing, a long hot-water run or weak pressure. Sort out the pipework and pressure issues before choosing the fitting.
How to Install a Laundry Tub Step by Step
Ten steps, in the order that keeps you out of trouble. The first four are about the drain and the fixing, because nothing later matters if the trough ends up in the wrong place.
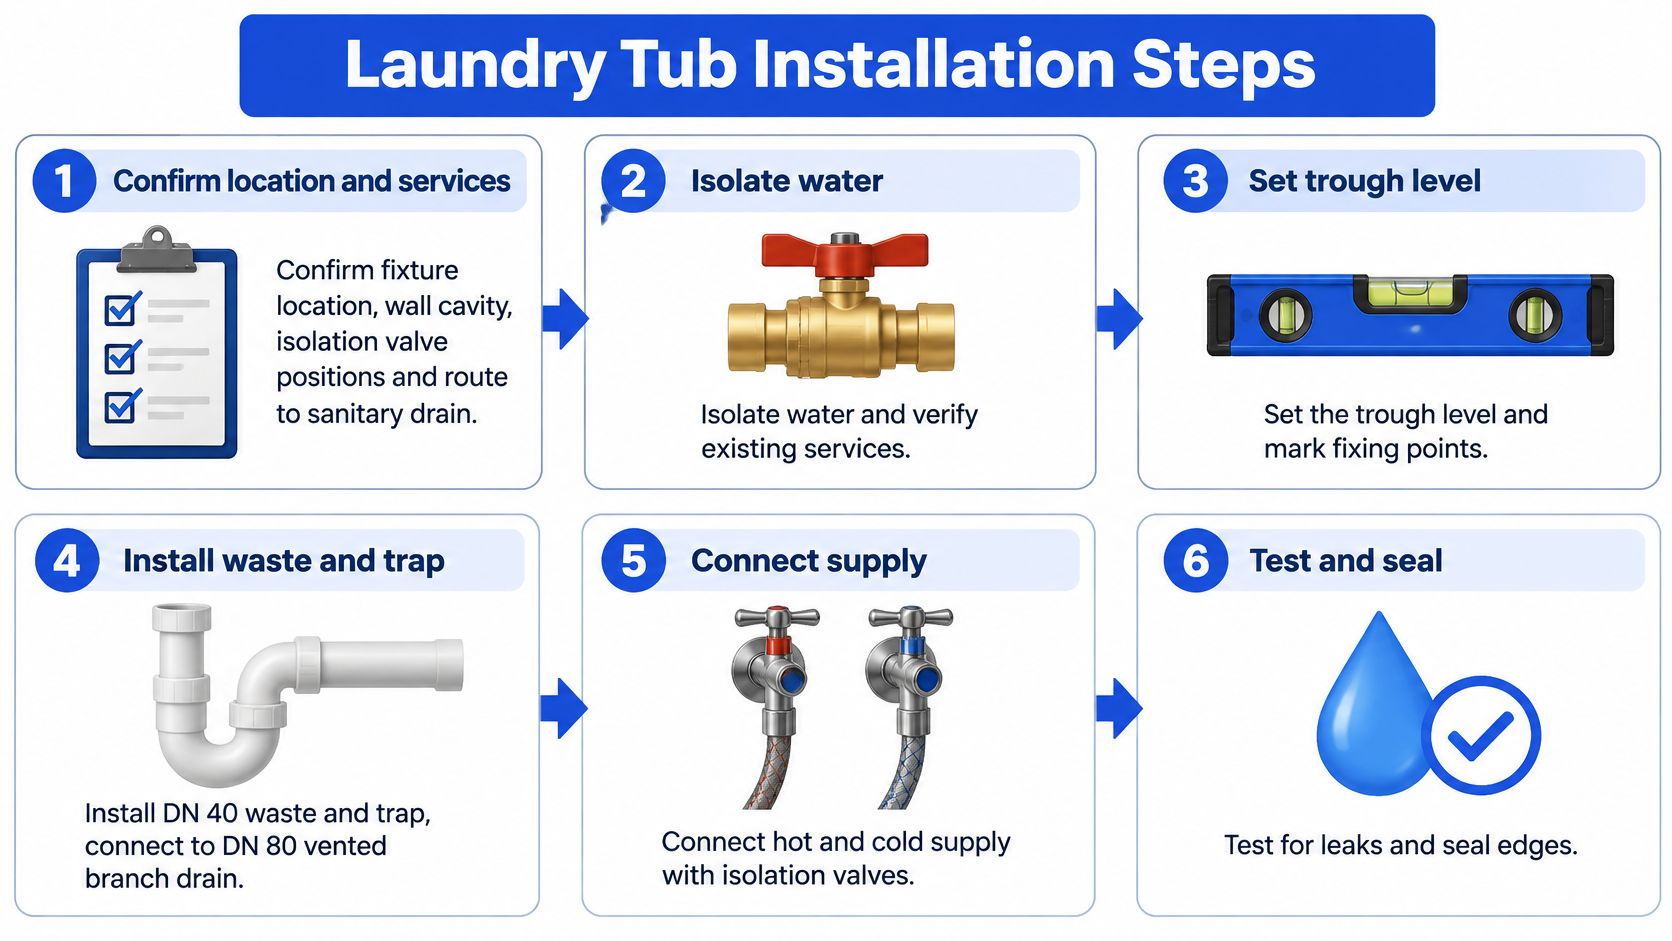
- Confirm the location, the wall cavity and the drain route. Note where the isolation valves will sit and the path the waste will take to the sanitary drain. This takes ten minutes on paper and saves a weekend of rework.
- Isolate the water and verify the services. Close the isolating valve, open the tap and confirm the line is shut off. Then check what the existing pipework is made of and whether the hot and cold are where you assumed. Trusting one valve on a run that also feeds the toilet next door is the classic mistake.
- Set the trough level and fix it securely. Use a spirit level across both directions and pack the brackets before you tighten anything. A trough that's out of level holds water in one corner and drains slowly for the next fifteen years.
- Install the waste outlet and trap. Bed the waste flange on the manufacturer's seal, seat it squarely, and line the trap up without strain on the joints. Putty and silicone aren't interchangeable, so check what the trough material accepts before you bed anything.
- Connect the hot and cold supplies through accessible isolation valves. Accessible is the word that matters. Valves buried behind a fixed cabinet panel will be found by the next plumber with a saw.
- Fit the WELS-rated tap with the manufacturer's seals and back-nuts. Hand-tight plus a quarter turn is usually right. Overtightening cracks the tap body, and that crack shows up as a drip down the back of the cabinet weeks later.
- Flush the supply lines before you connect. Run water through into a bucket first. Skip it and the swarf and debris end up lodged in the aerator, which reads as "low pressure" until someone unscrews it.
- Give every pipe run mechanical support. Clip the waste and the supplies at the spacing the pipe material calls for. Unsupported pipe sags under its own weight plus water, and a sagging trap holds a permanent pool.
- Leak-test every joint. Dry the joints, run the water, then wipe with tissue. Tissue shows a weep that a visual check misses.
- Discharge-test the trough at full flow. Fill it, pull the plug and watch how fast it clears, then run the washing machine through a spin cycle if it discharges over the rim.
If you want to see the sequence in motion before you start, this walkthrough covers the same order of work.
A sound installation shows itself quickly. No weeping at the joints after the pressure test, steady drainage at full flow with no gurgle, and every valve reachable without removing cabinetry.
The failures that come back are consistent:
- Inadequate support on the waste run, which sags and traps water.
- Inaccessible isolation valves behind a sealed panel.
- Incorrect fall, either flat or running backwards to the trap.
- Unsealed penetrations through the cabinet or wall, letting water track into the frame.
- Cross-connection with stormwater, which sends laundry waste where it doesn't belong.
Leaks, Slow Drains and Smells and How to Fix Them
Water under the trough usually points to a waste connection, not a supply pipe. Check for a washer sitting crooked or a loose slip nut. Dry the joint, reseat the washer, hand-tighten the nut, then run water and check again.
| Symptom | Likely cause | Fix |
|---|---|---|
| Water pooling under the trough | Unsealed waste or loose slip nut | Reseat the washer, hand-tighten the nut and retest |
| Gurgling or slow drain | Insufficient fall or waste run beyond the length limit | Check the fall and shorten the run; call a plumber if the layout must change |
| Overflow during machine discharge | Discharge over the rim exceeds drain capacity | Move to a dedicated connection and confirm the DN 40 discharge pipe |
| Weak flow or tap noise | Blocked strainer or low pressure | Clean the strainer and check flow against the WELS rating |
| Sewer smell from the waste | Dry trap or missing vent | Run water to refill the trap and check the trap-to-vent arrangement |
| Water in the wall cavity | Failed joint or cross-connection with stormwater | Isolate the supply, retest every joint and have a plumber confirm stormwater separation |
A gurgling drain often signals an airflow or layout problem rather than a simple blockage. Check whether the waste has adequate fall and whether the run exceeds the permitted length for the setup. Drain cleaner cannot correct a flat or poorly arranged pipe.
For weak flow, unscrew the aerator, rinse the strainer and refit it. If the noise or low flow persists, check the supply rather than forcing the tap. A sewer smell may mean the trap has dried out, so run water to refill it. If the smell remains, the trap-to-vent arrangement needs checking.
Water inside a wall cavity needs prompt attention. Isolate the supply and stop using the trough until the source is found. A failed joint can keep wetting the wall, while a cross-connection can send laundry waste into stormwater. Arrange water leak repairs and detection if the leak is concealed or cannot be traced safely.
Start with the simple checks: clean the strainer, refill the trap and inspect the slip nut. If water is reaching the wall cavity or the drain layout needs changing, call a plumber rather than opening the wall or altering the pipework yourself.
Decide Whether to Hire a Licensed Plumber
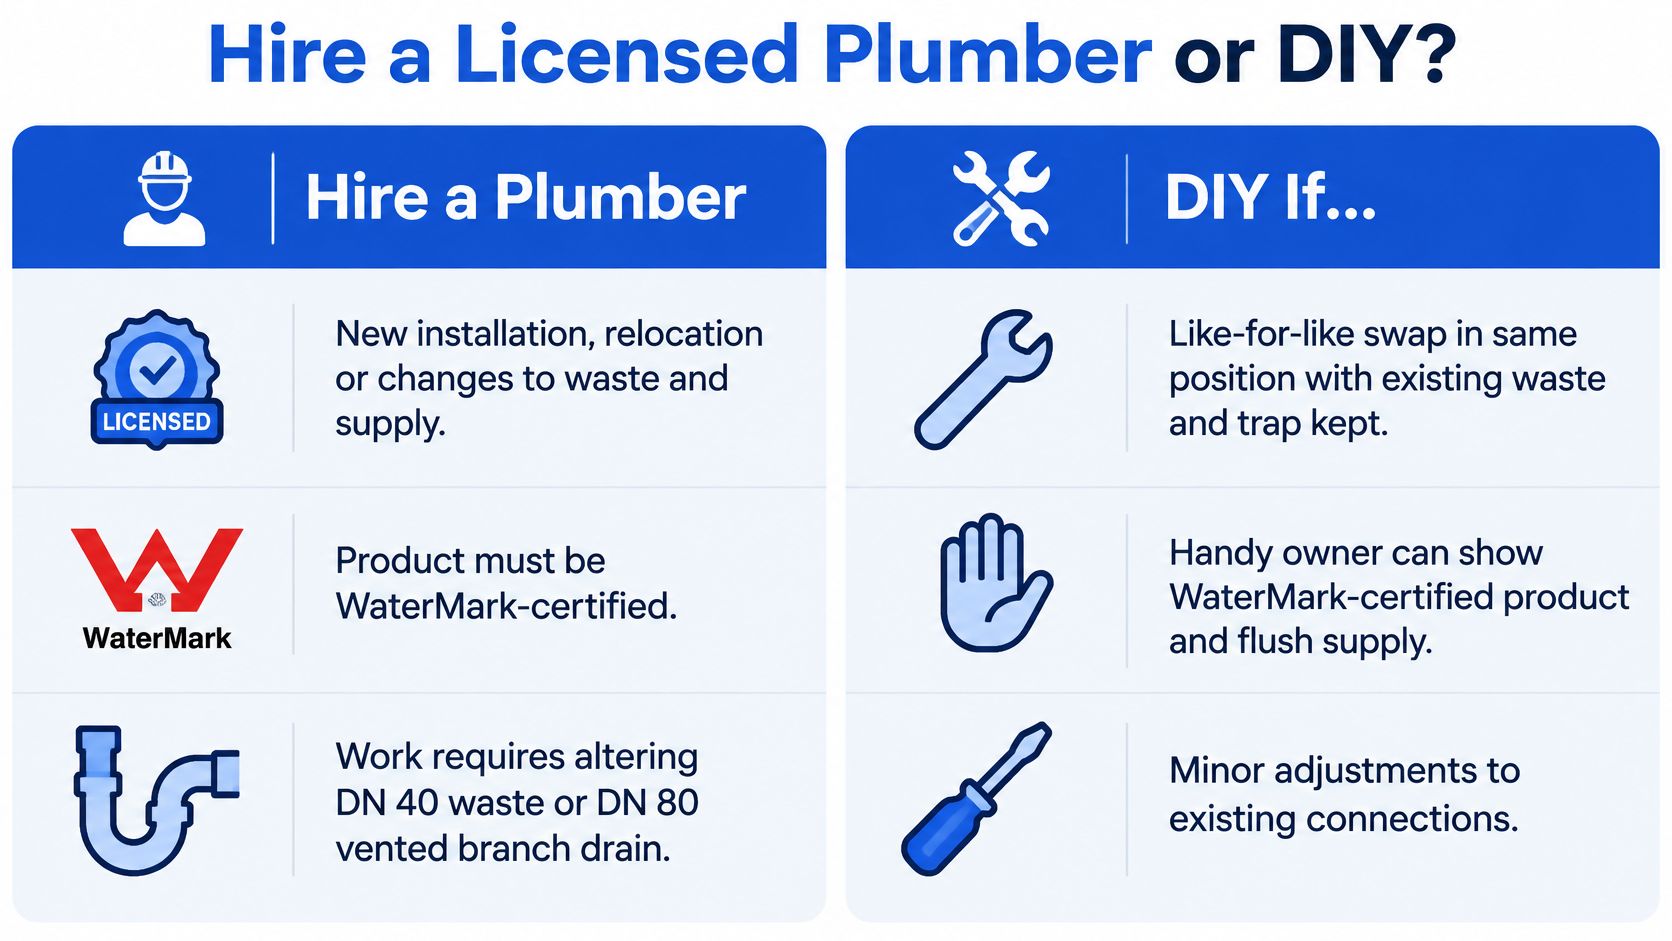
Start with the waste and drain, not the tub. A like-for-like swap in the same position may look simple, but plumbing work should be handled by a licensed plumber, who can confirm whether certification is required and issue the compliance certificate where applicable. The certificate threshold is $750 or more. Ask about compliance before work starts, especially if the existing connections are worn or the drain arrangement is unclear.
A relocated tub, a new waste connection, changes to the sanitary drain or gully, and any work below ground are clear reasons to hire a licensed plumber. These changes can affect drainage and the paperwork required, so confirm the scope and inspection requirements before choosing a tub or starting the job.
Australia's plumbing requirements developed from the AS 3500 standards consolidated in 1990. The National Plumbing Regulators Forum was established in 2002 to develop a consistent Plumbing Code of Australia, and the code was incorporated into the National Construction Code in 2011. The history of the National Construction Code explains the national framework behind plumbing requirements for waste, traps, drainage connections and water services.
For cost context, Home Beautiful reported in 2024, citing hipages, that an Australian laundry renovation costs AUD 5,000 to AUD 25,000. That range covers whole renovations, not just a tub. A straightforward replacement is a smaller scope than a renovation, while relocating the tub or altering drainage adds work.
Before requesting a quote, measure the waste position, trace the drain route, confirm the cabinet space and tap location, and take photos of the waste and drain. A clear scope makes it easier to compare quotes line by line. For larger projects involving several trades, Exayard plumbing estimating software can help organise and compare estimates.
Total Plumbing & Hot Water Systems offers laundry and bathroom renovations, advises on options for different budgets, and provides upfront pricing and quotes over the phone. Its plumbing and renovation services cover renovation work for laundries and other areas of the home. Call 0418 550 372 or visit Total Plumbing & Hot Water Systems to request a quote.